
Josie Period Pants
Hello sweet pals and welcome to our Josie Period Pants tutorial. We have been wanting to design a sustainable alternative to tampons and pads for ages and are delighted to have found something that works for us when we are bleeding. The gusset is sewn using a specialist fabric called Zorb® Original with SILVADUR™. It is an interlining material which is used between two fabrics as a super absorbent layer. It absorbs 10x its weight in half a second whilst controlling odours. We think these are a total game changer. We especially love wearing these period pants at night to avoid yet another pair of bed sheets getting stained.
We know finding all the notions to make underwear can be overwhelming so we have put together some super handy kits which include everything you need to make these pants here.
You have two options when making the Josie period pants, you can either use the original gusset which is perfect for lighter flow days, or you can use our specially designed period pant gusset which is ideal for regular to heavy flow days.
If you already have the Josie Bra and Pants Pattern and you can download the Period Pants Gusset PDF Pattern Piece for free.
Below i’ll take you through step by step how to make the pants from start to finish. If you have already made a normal pair of Josie pants the construction is very similar so I think you will find it a breeze. See you at the sewing machine folks!
1. Let’s start with cutting out. Below are the two options. The first is with the period pants gusset extension (for heavy flow days), the second is with the original gusset (for lighter flow days).

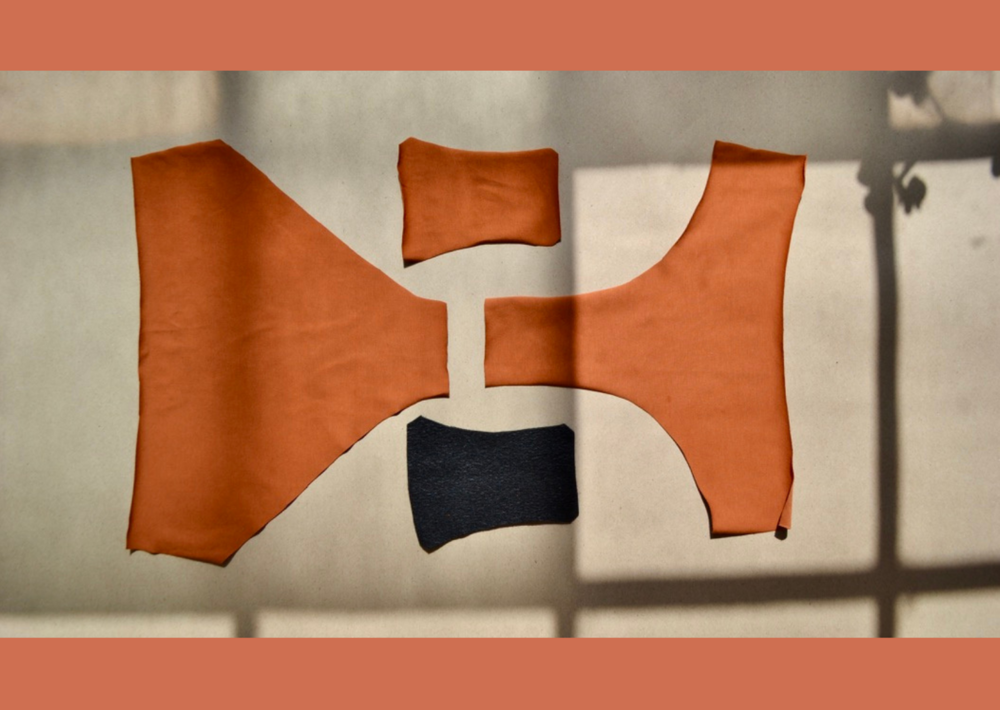
2. Now we need to layer our organic cotton jersey with our absorbent fabric (it doesn’t matter about right or wrong sides together here, either way is fine). You can then overlock or zigzag stitch the edges as shown below.
Top Tip: All seam allowances are 7mm
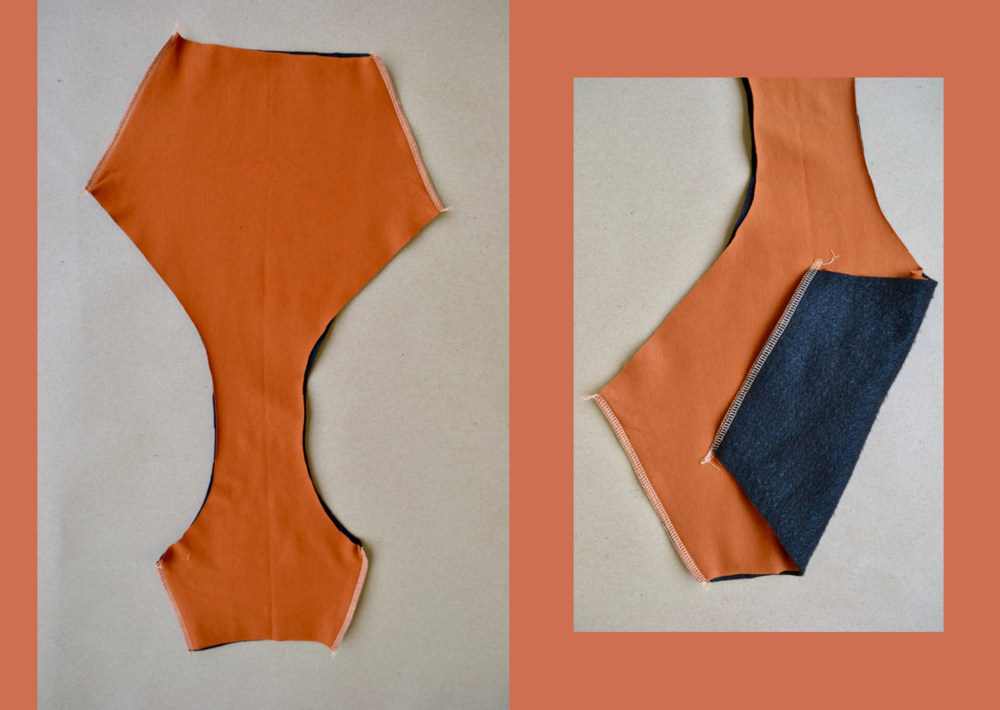

3. Now we sew our front and back pieces, right sides together, at the crotch using either an overlock or zigzag stitch.

4. Next up we lay our chosen gusset piece on the wrong side of the pants and stitch it in place around the edges with a straight stitch. Make sure your absorbent fabric is sandwiched in the middle between the two layers of jersey.
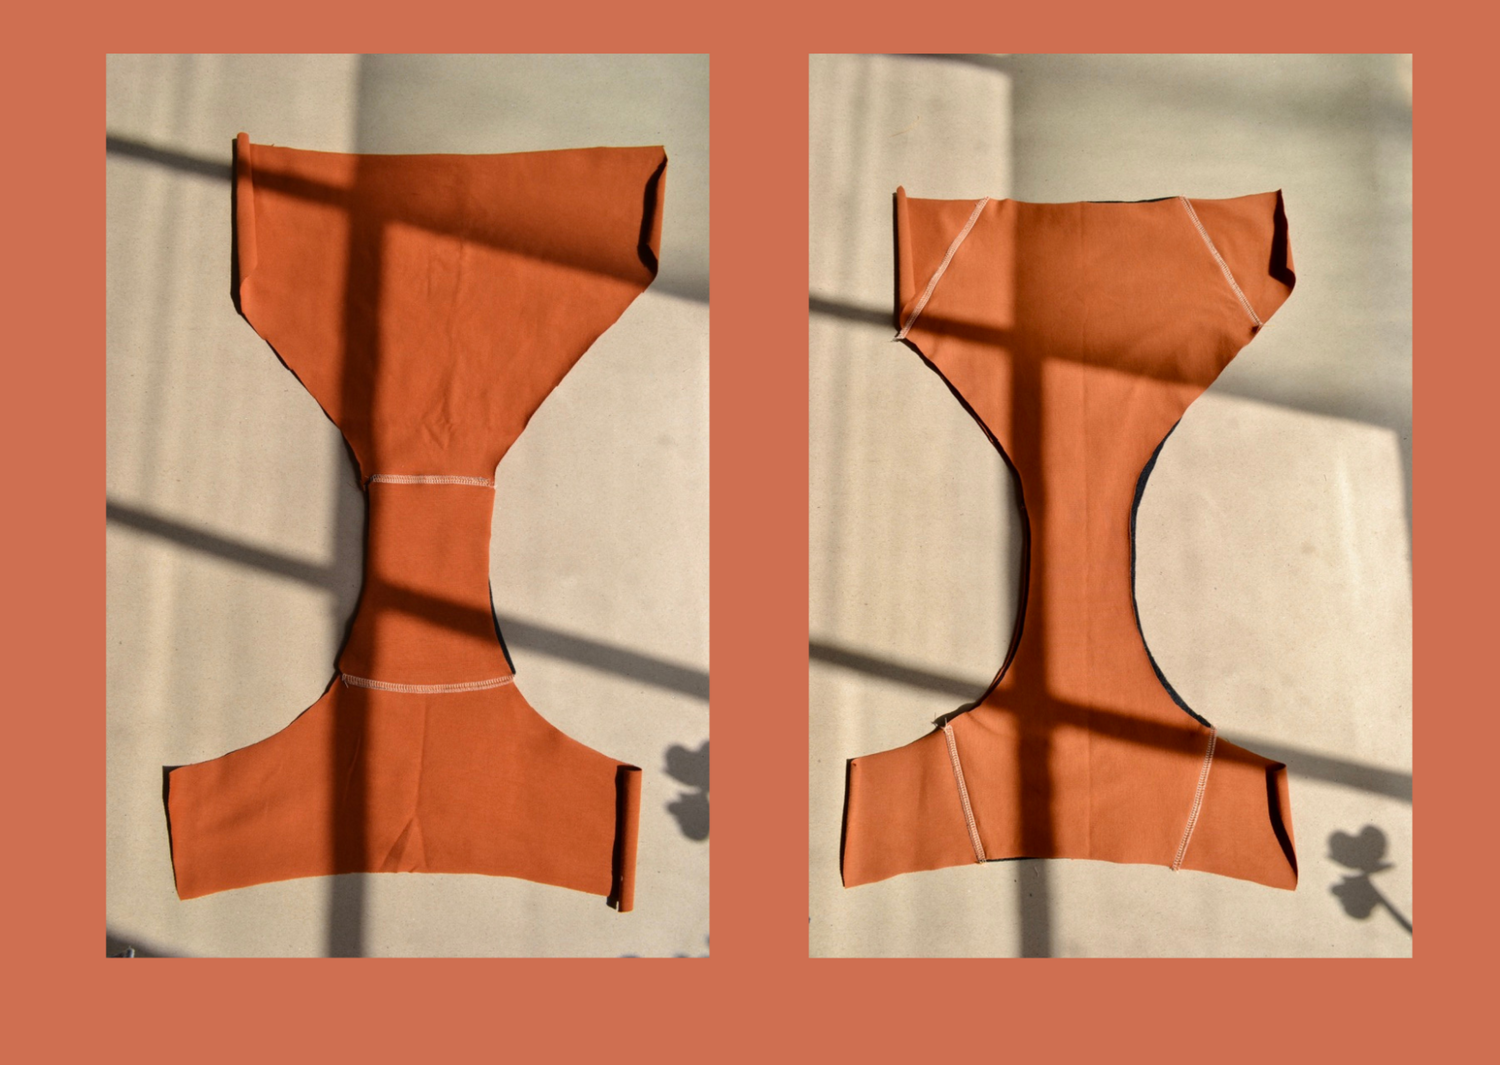
5. Now it’s time to close up the side seams of the pants with the right sides together using an overlock or zigzag stitch.

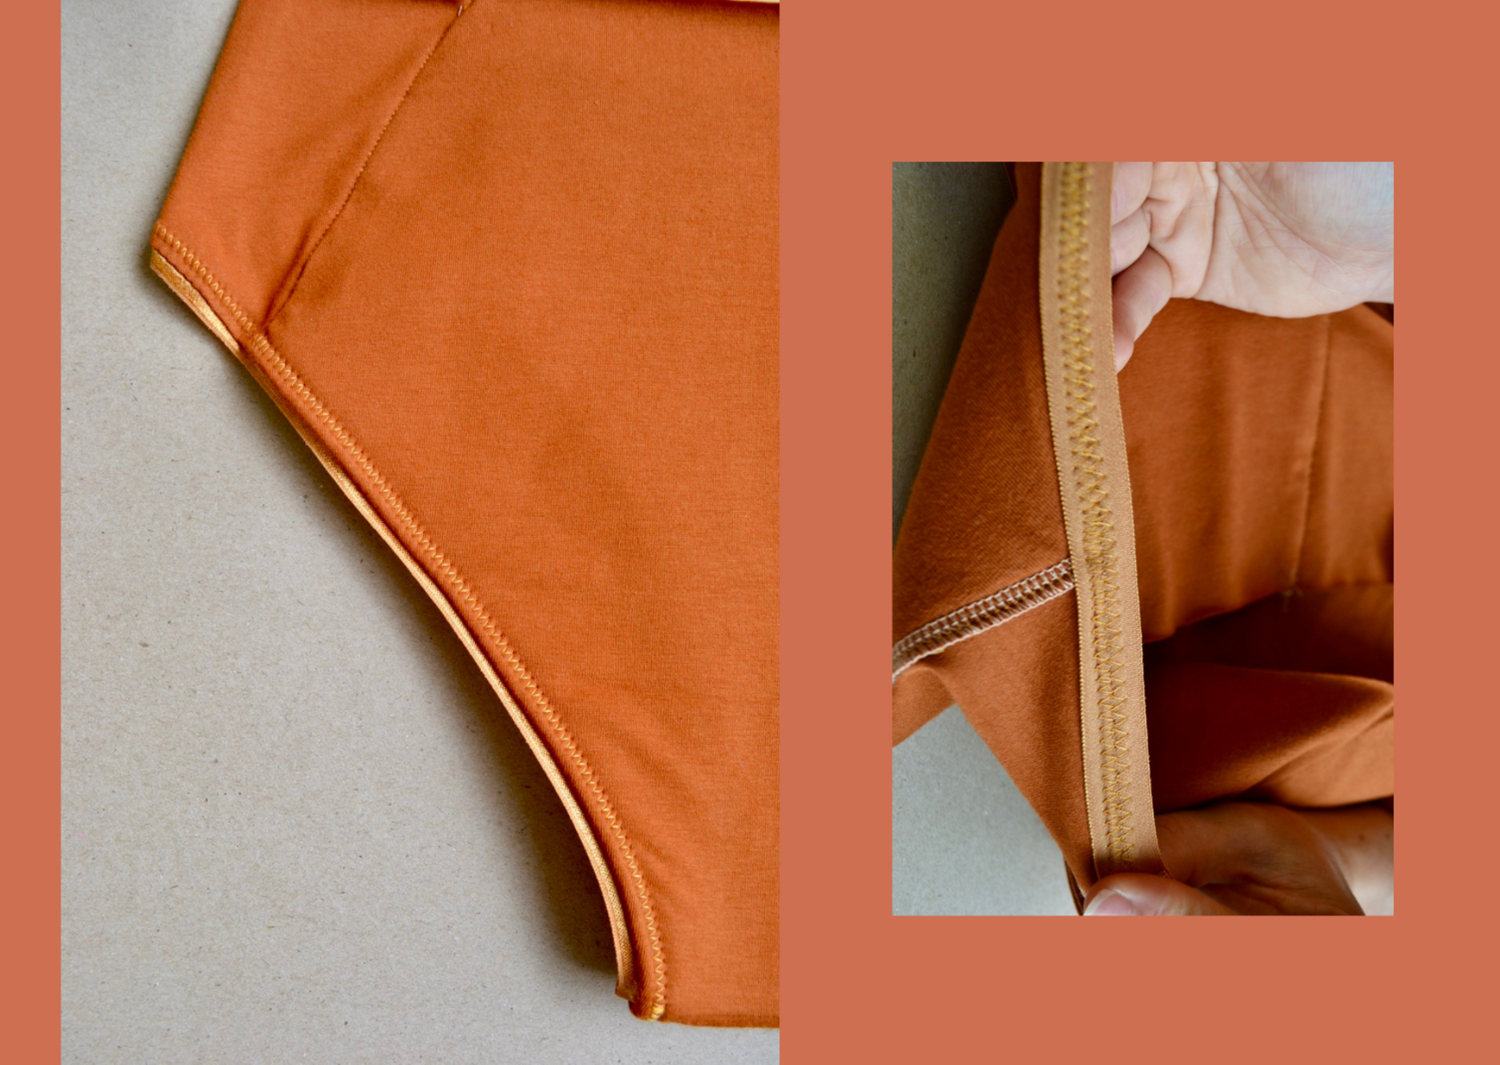
6. Bring on the elastic! We have a super in depth video tutorial on sewing elastic which I recommend checking out here before you start. For these pants we will be using the Sewing Fold Over Elastic on to a Raw Edge technique - or SFRE for short. I tend to start with the leg opening. Zigzag the right side of the elastic to the right side of the jersey, making sure you are catching all the layers of the gusset. Once you have sewn all the way around trim away any excess fabric by snipping as close as you can to your stitch line.
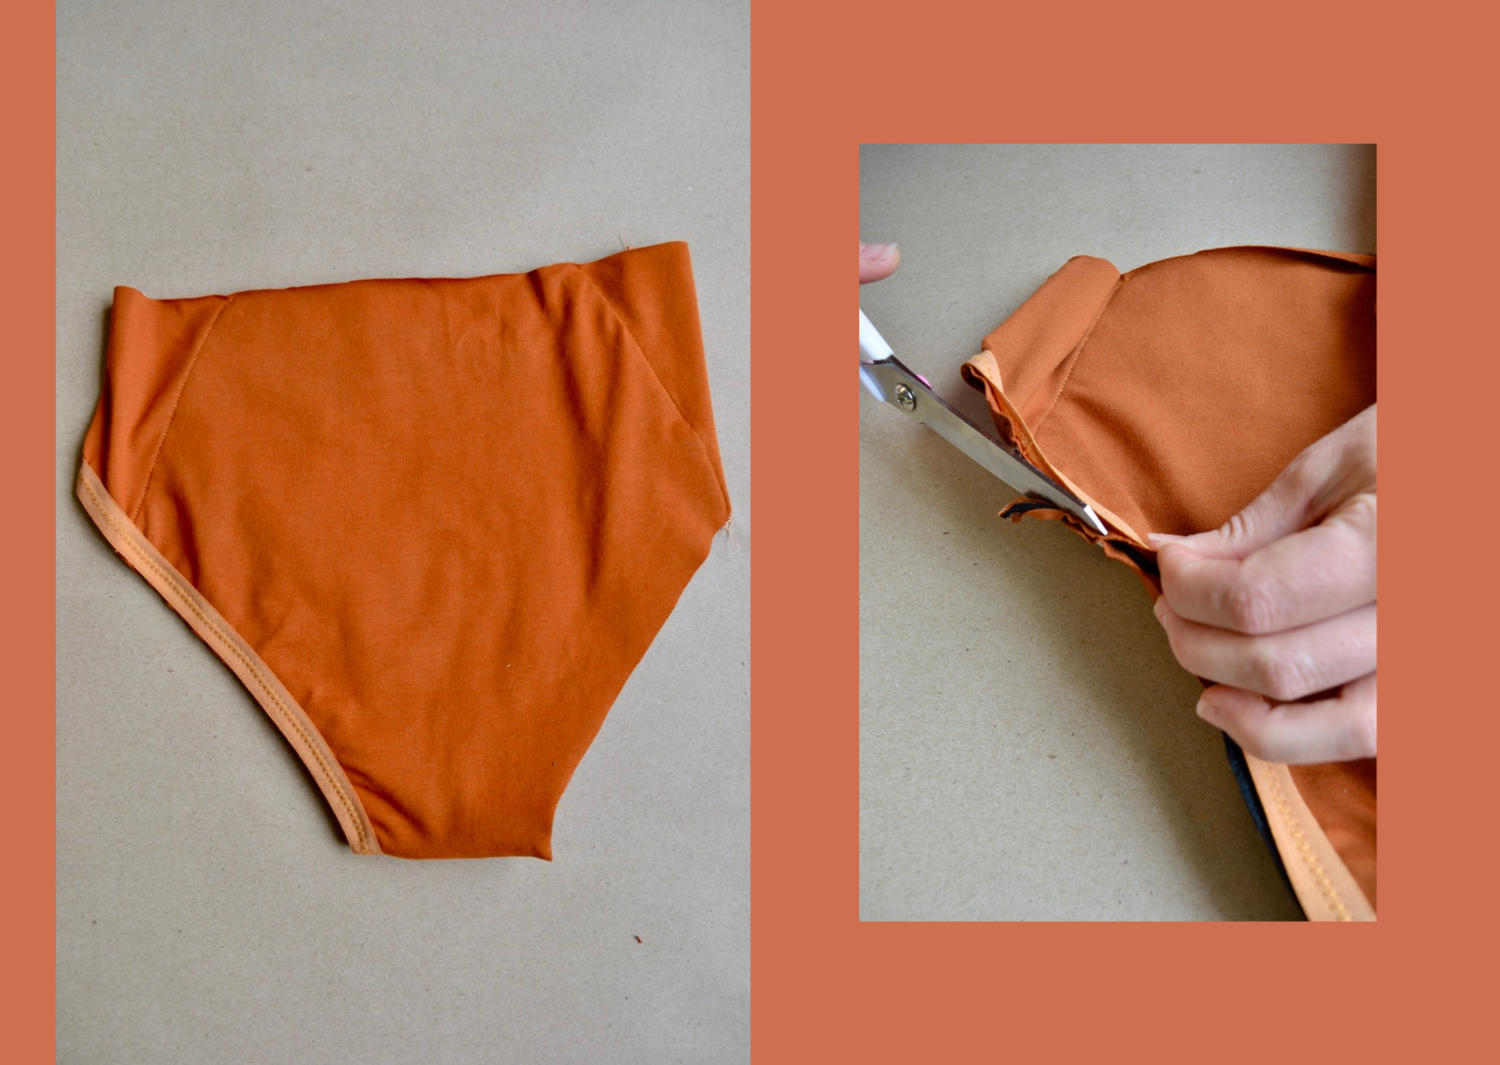
7. Now flip the elastic to the back and do a second line of zigzag stitching to hide your raw edge. The two lines of stitching should run parallel to each other.
8. Repeat the elastic process for the second leg opening and the waistband and that’s it! You made your first pair of period pants, mega congratulations!
We’ve had a few people enquire into how to wash the Josie period pants. We recommend rinsing in cold water in the sink first then washing at 30 degrees.

We would love to know how you got on! Feel free to use #josiebraandpants and tag us @mademywardrobe Each month we pick our favourite makes to win a free Made My Wardrobe PDF pattern of your choice!